신선한 모짜렐라 선택하세요
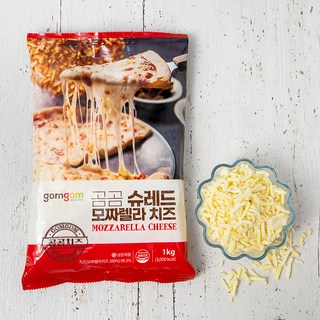
곰곰 슈레드 모짜렐라 치즈의 주요 특징과 상세 스펙을 확인하세요.
최상의 신선도와 풍미의 곰곰 슈레드 모짜렐라 치즈는 고품질 원재료로 만들어져 있어, 요리에 깊은 맛을 더해 주며.
주요 특징
곰곰 슈레드 모짜렐라 치즈는 1kg의 대용량으로 제공되어 다양한 요리에 활용할 수 있습니다. 뛰어난 녹는 점과 부드러운 식감은 피자, 파스타, 샐러드 등 여러 가지 요리와 잘 어우러집니다. 또한, 별점 5.0으로 고객의 사랑을 받고 있는 제품입니다.
상품 스펙
| 항목 | 세부 스펙 |
|---|---|
| 상품명 | 곰곰 슈레드 모짜렐라 치즈 |
| 중량 | 1kg |
| 판매가 | 가격 정보 확인 필요 |
| 배송 | 로켓배송 |
| 평점 | ⭐5.0 (최고 점수) |
곰곰 슈레드 모짜렐라 치즈를 활용하여 간편하고 맛있는 요리를 즐기고 싶으신가요? 여기를 클릭하여 자세한 정보를 확인하세요.
간단 레시피를 따라하세요
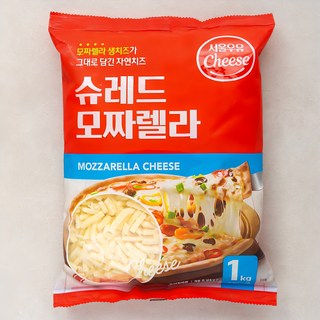
서울우유 슈레드 모짜렐라 치즈로 간편하게 만든 요리 모습입니다.
여러분, 이런 상황을 겪어보신 적 있으신가요? 퇴근 후, 갑자기 허기가 지거나 간단한 요리가 필요할 때, 모짜렐라치즈와 함께라면 해결할 수 있습니다!
상품 사용 경험
주요 장점
- 치즈의 풍부한 맛 - 서울우유 슈레드 모짜렐라 치즈는 깊고 진한 치즈 맛이 일품이에요.
- 간편한 사용 - 1kg의 대용량이라 여러 요리에 활용할 수 있어요. 한 번 구매하면 오랫동안 사용 가능합니다.
- 다양한 활용성 - 피자, 샐러드, 파스타 등 다양한 요리에 곁들일 수 있어요.
활용 방법
이 제품을 아래와 같은 방법으로 활용해보세요:
- 피자 토핑: 좋아하는 피자 도우 위에 서울우유 모짜렐라 치즈를 듬뿍 올리고 오븐에 구워보세요. 갓 구운 피자의 풍미가 일품이에요!
- 샐러드에 첨가: 신선한 채소와 함께 모짜렐라 치즈를 섞어 고소한 샐러드를 만들어 보세요. 건강한 한 끼가 완성됩니다.
- 치즈토스트: 식빵 위에 모짜렐라 치즈를 올리고 구워보세요. 간편하면서도 맛있는 간식이 됩니다.
지금 서울우유 슈레드 모짜렐라 치즈를 할인된 가격으로 만나보세요!
나만의 요리 비법 공개!
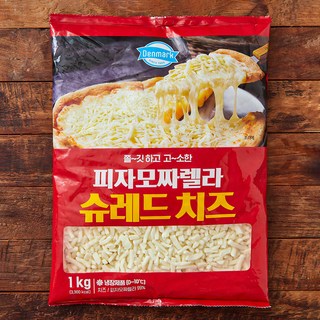
덴마크 피자모짜렐라 슈레드치즈의 주요 특징과 사용법을 한눈에 확인하세요.
이 상품의 핵심 특징을 확인해보세요!
상품 특징
- 고급 품질: 덴마크에서 생산된 프리미엄 모짜렐라치즈로 신선한 풍미를 자랑합니다.
- 사용 용이성: 슈레드 형태로 되어 있어 바로 요리에 사용할 수 있어 편리합니다.
- 다양한 요리에 적합: 피자, 파스타, 샐러드 등 다양한 요리에 잘 어울립니다.
사용 방법
- 필요한 양만큼 덴마크 피자모짜렐라 슈레드치즈를 덜어냅니다.
- 피자나 파스타 등 요리에 직접 뿌려줍니다. 오븐에서 구울 경우, 치즈가 고르게 융화되게 합니다.
- 요리가 끝난 후, 접시에 담아 맛있게 즐깁니다!
활용 팁
- 피자를 굽기 전에 모짜렐라치즈를 한 겹 더 추가하면 치즈의 풍미가 더해집니다.
- 파스타 소스에 덴마크 피자모짜렐라 슈레드치즈를 넣으면 크리미한 맛이 더해집니다.
- 샐러드에 뿌려주면 신선한 식감과 함께 특별한 맛을 느낄 수 있습니다.
지금 상품을 할인된 가격으로 만나보세요!
다양한 활용법 알아보세요

리치골드 모짜렐라 슈레드 피자치즈로 이런 고민을 해결할 수 있습니다.
이런 고민, 이제 해결해드립니다!
실제 사용자의 경험담: "리치골드 모짜렐라치즈로 만든 피자는 정말 환상적이에요! 쉽게 만들 수 있어서 시간 절약이 됐어요."
자주 겪는 문제들
- 식사 준비에 시간이 부족한 여러분, 요리를 빠르게 끝내고 싶으신가요?
- 신선한 재료가 필요하지만, 항상 좋은 상태의 치즈를 구하는 것이 어려운가요?
- 가족이나 친구들과 함께하는 피자 파티, 치즈 없는 메뉴는 상상할 수 없으신가요?
해결 방법
- 리치골드 모짜렐라 슈레드 피자치즈는 1kg의 대용량으로, 소량으로 나누지 않고 한 번에 사용하기 좋아요.
- 신선한 냉장 자연치즈로 언제든지 고품질 치즈를 사용하여 간단한 요리부터 로제 파스타, 라자냐까지 응용할 수 있어요.
- 간편하게 피자 위에 올리기만 하면 되니, 친구나 가족들과 함께하는 시간에도 빠르고 쉽게 요리를 완성할 수 있어요.
지금 상품을 할인된 가격으로 만나보세요!
즐거운 요리 시간을 가져요
리치골드 모짜렐라 슈레드 피자치즈 1kg의 주요 특징과 장점을 확인하세요.
리치골드 모짜렐라 슈레드 피자치즈는 누구나 쉽고 맛있게 즐길 수 있는 최고의 선택입니다!
상품 특징 비교
- 1kg의 대용량 - 일반 가정에서 피자, 샐러드 등의 요리를 손쉽게 할 수 있습니다.
- 부드러운 식감과 고소한 맛 - 피자 뿐만 아니라 다양한 요리에 잘 어울립니다.
- 당일 발송 - 신선한 상태로 집까지 배송되어 더욱 믿음직합니다.
다른 제품과의 차이점
- 리치골드는 슈레드 형태로 제공되어 편리하게 사용할 수 있으며, 일반 블록 치즈보다 손질이 간편합니다.
- 5.0의 높은 별점 - 사용자 리뷰에서 긍정적인 반응이 많아 신뢰성이 높습니다.
- 많은 유사 제품들이 있지만, 리치골드는 냉장 자연치즈로 질감과 맛에서 확연한 차이를 보여줍니다.
구매 시 고려사항
- 1kg의 양이 적당한가? - 소규모 가정에서 적절한 양입니다.
- 가격과 품질의 적절한 비율 - 본 제품은 가격, 품질 모두 우수합니다.
- 다양한 요리에 활용 가능 - 치즈 요리뿐 아니라 샐러드, 파스타 등에도 적합합니다.
지금 상품을 할인된 가격으로 만나보세요!